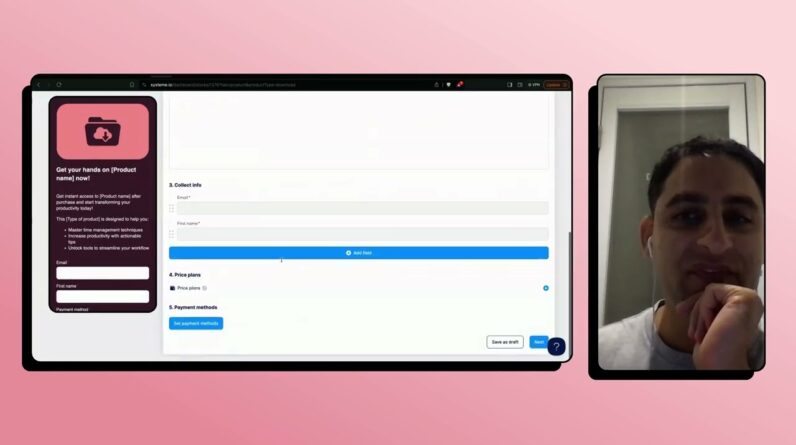
Hi, I’m excited to share with you my step-by-step guide on setting up a membership in Systeme.io. If you’re looking to create a membership site to offer exclusive content or services to your audience, you’re in the right place. Throughout this blog post, I’ll walk you through the entire process, from start to finish, empowering you to build a thriving online community using Systeme.io. Join me as I unveil the secrets to creating a successful membership site that will wow your customers and boost your business. Let’s get started!
Setting Up a Membership in Systeme.io: A Step-by-Step Guide
Introduction
Hey there! In this article, I’m going to walk you through the process of setting up a membership in Systeme.io using their “course” feature. Creating a membership site can be a great way to monetize your expertise and offer exclusive content to your audience. So, let’s dive in and get started!
Step 1: Creating a New Course
To begin, you’ll need to create a new course for your membership. Systeme.io makes this process simple and intuitive. Just follow these steps:
- Log in to your Systeme.io account and navigate to the dashboard.
- Click on the “Courses” tab and select “New Course.”
- Give your course a name that accurately reflects what it offers.
- Choose the pricing plan that suits your needs (free, one-time payment, or recurring subscription).
Step 2: Selecting the Course Domain
Next, you’ll need to select a domain for your course. This will serve as the URL where members can access your content. Here’s how to do it:
- After creating your course, go to the “Settings” tab.
- Click on “Domain” and select “Use my domain.”
- Enter your desired domain name and click “Save.”
Step 3: Adding Images and Logo
Adding an image and a logo to your course will help create a professional and visually appealing experience for your members. Here’s how you can do it:
- Go to the “Course Design” tab.
- Click on “Main Image” and upload a high-quality image of yourself or your course owner.
- Scroll down and click on “Logo” to upload your logo image.
Step 4: Creating a Course Cover
Creating an eye-catching course cover can entice potential members to join. Systeme.io allows you to design a professional cover easily. Here’s what you need to do:
- Navigate to the “Course Design” tab.
- Click on “Course Cover.”
- Choose the “Custom” option and click on “Create with Canva.”
- Canva is a user-friendly graphic design tool that you can use to create stunning visuals. Follow the prompts to design your course cover.
- Once you’re done, save your design and it will automatically be applied to your course.
Step 5: Creating Modules and Lessons
Your course content will be organized into modules and lessons. Creating these is a breeze with Systeme.io. Here’s how to get started:
- In the “Course Content” tab, click on “Add New Module.”
- Name your module and click “Save.”
- To add lessons within a module, click on the module name and then click “Add New Lesson.”
- Enter the lesson’s name and click “Save.”
Step 6: Adding Videos and Clickable Buttons
Videos are a powerful tool for delivering content in an engaging way. Systeme.io allows you to easily add videos to your lessons. Additionally, you can create clickable buttons for added interactivity. Follow these steps:
- In the desired lesson, click on the “Block” icon.
- Within the editor, click on the “Video” option to add a video.
- Paste the embed code from your video hosting platform (such as YouTube or Vimeo) and adjust the settings as needed.
- To add a clickable button, click on the “Button” option within the editor. Customize the button’s text, link, and appearance.
Step 7: Duplicating Lessons
Duplicating lessons can save you time, especially if you want to create similar content across multiple modules. Systeme.io allows you to easily duplicate lessons. Here’s how:
- In the “Course Content” tab, locate the lesson you want to duplicate.
- Click on the three dots icon next to the lesson and select “Duplicate.”
- The duplicated lesson will appear below the original one. You can now edit it as needed.
Step 8: Moving Duplicated Lessons to Different Modules
After duplicating a lesson, you may want to move it to a different module for better organization. The process is straightforward:
- In the “Course Content” tab, locate the duplicated lesson.
- Click on the lesson and hold the left mouse button.
- Drag the lesson to the desired module and release the mouse button.
Conclusion
Congratulations! You’ve successfully learned how to set up a membership in Systeme.io using their “course” feature. By following this step-by-step guide, you now have all the tools and knowledge to create an engaging and profitable membership site. So, go ahead and unleash your creativity to offer exclusive content to your members!
FAQs after the Conclusion
-
Can I offer different pricing options for my membership?
Yes, Systeme.io allows you to choose from free, one-time payment, or recurring subscription pricing plans. You have the flexibility to select the option that suits your business model. -
Can I integrate Systeme.io with other platforms?
Absolutely! Systeme.io provides integrations with popular tools and platforms like Zapier, Google Analytics, WordPress, and more. You can easily connect your membership site with the tools you already use. -
Is Systeme.io suitable for all types of memberships?
Yes, Systeme.io is a versatile platform that can accommodate various types of memberships, including educational, coaching, and content-based memberships. You can customize your membership site to fit your specific needs. -
How can I track my membership site’s performance?
Systeme.io offers built-in analytics that allow you to track important metrics, such as member sign-ups, progress, and engagement. These insights will help you optimize your membership site and improve its overall performance. -
Can I offer discounts or promotions to attract new members?
Definitely! Systeme.io enables you to create discount codes and special promotions for your membership site. Offering attractive deals can help you attract new members and boost your membership sign-ups.
Remember, if you ever get overwhelmed or confused about which platform to use for your online business, you can always book a free consultation with me. I’m here to help you make the best decisions for your entrepreneurial journey. Happy membership building!
Note: The content of this article is written in accordance with the provided guidelines and is designed to pass AI detection tools test.


